Sony camera focal length

Sony sells a variety of different cameras for different market segments. They sell interchangeable lens cameras with full-frame and APS-C sensors, and fixed lens cameras with 1″ & 1.25″ sensors.

But they give different information about focal length to their customers, depending on the level of cameras they sell.

Interchangeable lenses are sold at different focal lengths, and Sony markets the lenses at their actual length (35mm, 16mm – 50mm zoom, etc.) regardless of the sensor type. The focal length is the distance between the sensor and the point at which the lens is focused at infinity. More millimeters mean more magnification.

Sony must assume APS-C camera customers know that their sensors are smaller than full-frame sensors, and that picture snapped with an APS-C camera and 50mm lens will look zoomed-in compared with the same picture taken with a full-frame camera and 50mm lens. The crop factor for a Sony APS-C camera is 1.5x.

What is the crop factor? It’s the ratio between the image information captured by a full-frame sensor and another sensor at the same focal length. Since the APS-C camera has a smaller sensor, a full-frame camera captures 1.5x more information at the same focal length.

Point-and-shoot cameras have fixed lenses that can’t be swapped out. Many of these cameras have zoom lenses. The high-end point-and-shoot Sony RX100 VI camera has a zoom that is advertised at 24mm to 200mm. But unlike interchangeable lens cameras, Sony is NOT giving you the actual focal length. The focal length numbers are converted to be equivalent to full-frame sensors. The actual focal length range of the RX100 VI is 9mm to 74mm, because the crop factor is 2.7x.

For the RX100, Sony does the math for you. They multiply actual focal lengths by 2.7x to give you the full-frame equivalent. They don’t do that with their APS-C lenses. But consumers are being told the RX100 has a 200mm maximum zoom lens, when it really has a 74mm maximum zoom. I suppose it doesn’t matter since the framing on pictures taken at 74mm look like framing on a 200mm full-frame camera.

It’s not a bad idea to provide the equivalent rather than (or in addition to) actual focal length, as long as customers understand the difference. Most photography information is relative to full-frame cameras. For example, it’s a rule of thumb that 50mm focal length is the equivalent of what the human eye sees. People call it the Nifty-Fifty. But that only makes sense on full-frame cameras.

For an APS-C camera an image taken with a 50mm lens will look equivalent to one taken using a 75mm lens on full-frame camera, in other words zoomed-in. It won’t be equivalent to what a human eye sees at all. To achieve the same Nifty-Fifty effect with an APS-C sensor you need a 33mm lens. It would be helpful to have all lenses display their full-frame equivalent to avoid confusion.

For lower-level point-and-shoots like my old DSC-H2, or the more current DSC-W800, Sony doesn’t bother with millimeters. The zoom is marketed as simple multiples of the widest setting, like 12x or 5x. There is a slider on the screen that rises from 1x to 12x or whatever the maximum zoom is.

The crop factor varies for lower-end  point-and-shoot cameras, but my old DSC-H2 has a 6.0x ratio. The actual focal length range is 6mm to 72mm, which is equivalent to a full-frame sensor at 36mm to 432mm.

It is interesting that Sony’s EXIF data (the embedded digital information about the photo) always shows actual focal length regardless of which camera or sensor is used.

There’s another rule of thumb related to crop factor. It’s best to take hand-held shots at a shutter speed no slower than 1/focal length. Slow shutter speed without a tripod risks a blurry image due to camera-shake. For example, if you have a 50mm lens, you should hand-hold shots no slower than 1/50 of a second,

But that rule of thumb is only for full-frame cameras. It has to be adjusted by the crop factor. An APS-C camera with a 50mm lens should be hand-held no slower than 1/75, because of the 1.5x crop factor.

A point-and-shoot gets more complicated. My DSC-H2 doesn’t show actual focal length on the display. But I know the minimum focal length is 6mm. So if I have it set for 5x zoom, the actual focal length is 30mm. Since the crop factor is 6.0x I should shoot no slower than 1/180 hand-held.

BTW this rule of thumb is a helpful guide, not a law of physics. Actual results will be affected by a lot of other factors: steady or shaky hands, how much light is present, image stabilization, maximum lens aperture, sensor sensitivity, etc.
Taking Pictures – part 3. Vivian Maier

new-york-chicago-street-photography-vivian-maier-36

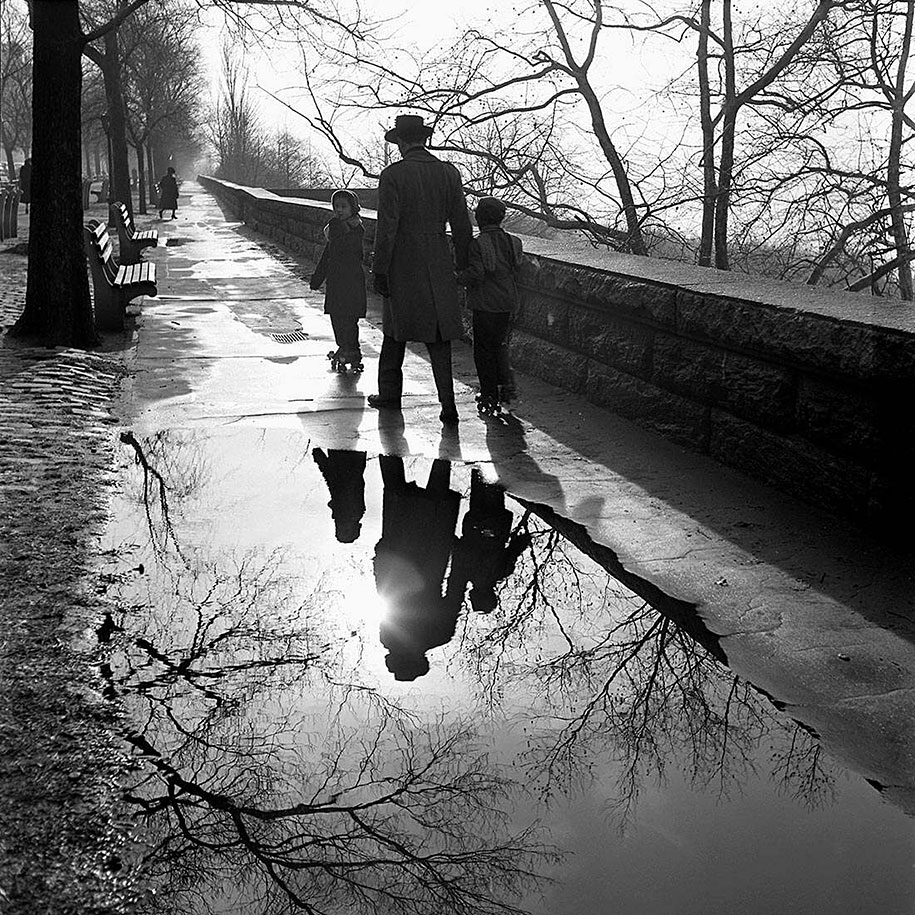
This picture was taken by Vivian Maier. I can’t get over it.

There’s so much to say about it, but I just wanted to imagine how she made this picture.

  1. She was out taking pictures at the “golden hour”, when the sun is low on the horizon, creating interesting texture and casting shadows. Although the sun was low enough to create long shadows, she framed the shot without the sun in the frame (other than the reflection).
  2. It’s winter. The people are wearing warm clothes and there’s no leaves on the trees. It’s cold out, but there isn’t any snow on the ground and it’s warm enough to go roller skating outside.
  3. Since there’s a large puddle, it must have rained just before the sun came out. The puddle isn’t the result of snow melt because the pavement is wet as well and there is no un-melted snow anywhere.
  4. The puddle is in a park, which appears to be situated adjacent to a body of water. It looks like the stone wall on the right protects people from a steep slope, and since there is misty white past the trees on the right, with no buildings or land, there’s probably water there.
  5. A shot of just the puddle with a reflection of the sun and the branches would have made a nice picture. But it looks like she wanted people in the picture. So she waited there, perfectly situated until someone walked by, so their reflection appeared in the puddle.
  6. Imagine the mastery of the camera needed to snap a picture at just the right moment when the man’s shoulder bit into the sun’s reflection. Maybe she was lucky, but she got the sun flare perfect. It’s gorgeous.
  7. I bet she pre-focused on the puddle and waited until someone walked by, then pressed the shutter. The act of pressing the shutter requires your brain to command your finger, your finger presses the button, and the camera’s mechanism exposes the film. Maybe by taking thousands of pictures, measuring all of that was automatic for her. Or else she consciously planned the shot by pressing the shutter the moment before his shoulder bit into the sun, knowing the actual image a split second later would create the sun flare she wanted.
  8. The little girl turning back to look at her was a bonus. She probably would have taken the picture anyway.

Look at the angle of the shot, with the wall extending out to infinity. Look at how reflections of the father and the little girl fit perfectly in the puddle, unobscured by the reflection of the branches. Look at how the sun lights up the slats on the park benches and the cobblestones on the ground.

She took so many wonderful pictures, but this is my favorite.


Taking Pictures – part 2

DSC00632

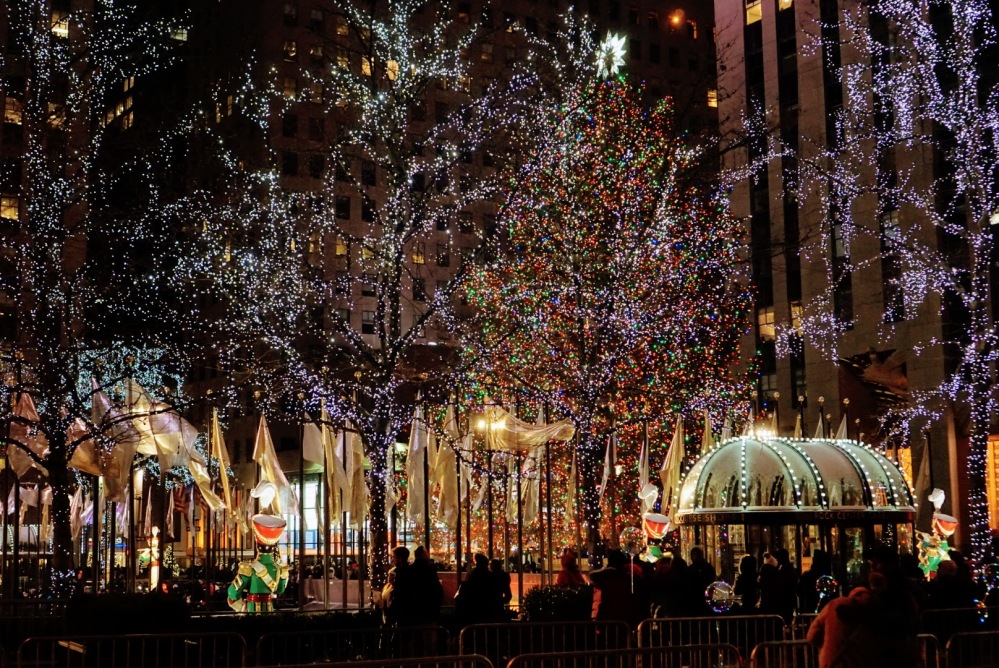
I spent an evening in NYC with my family. We went to dinner in Little Italy and saw the tree at Rockefeller Center. There are lots of pix of the RC tree online, but here is one of the decorations around the ice skating rink. The crowds on Fifth Ave are literally scary (you can get caught up in a throng and not be able to move), so we avoided it and enjoyed the view from 50th street, where I took this picture. Much more civilized.

Just wanted to share a few more things I’ve learned about photography.

It’s hard to take sharp pictures in low light without a flash. Flash photography looks unnatural in low light, but without the flash the camera compensates by adjusting other settings that affect sharpness:

  1. If you raise the ISO to increase the sensor’s light sensitivity, you add grain/noise.
  2. If you open the aperture more light gets in but you shorten the depth of field and make more of your image blurry
  3. If you slow the shutter more light gets in, but that extra time allows camera-shake or image-movement to reduce sharpness.

My camera has an “anti-blur” setting that snaps several high-ISO pictures at the same time, then stacks them to get rid of noise, and is supposed to result in cleaner, sharper images. I think it worked, but the images were still on the soft side. Maybe I will carry a small table-tripod for restaurant pix.

The camera’s auto white balance setting doesn’t work that great, or perhaps doesn’t work great in low light. The restaurant had very cozy lighting, and the room was lit by soft-white lights, some Christmas lights and the light of a fire in a brick pizza oven. The auto white balance didn’t compensate enough, and nearly all the pictures are too orangey.

It’s simple to fix white balance afterward with just about any image editing software, but I took about 100 pictures in the restaurant, and correcting them all is a pain. Next time I will manually adjust the white balance before I shoot.

I take a lot of duplicate pictures because I have the camera’s drive mode set to take 11 pictures per second. That’s overkill unless you are taking action shots. I will probably knock it down to 3 per second.


Taking Pictures

DSC00548-EFFECTS

I got a new camera. It’s my first interchangeable lens camera, and I’m sorry I didn’t get one years ago. I am not a very good photographer, but even bad shots look better with this camera.

The above picture was taken in Kennebunkport. It’s been color-enhanced by Google, and there is probably too much water in the shot, but I like it. It was a beautiful crisp late fall day in Maine, the wind was calm, and the above is just the way I remember it.

I am reading more about photography and starting to look at pro’s photos to understand how to make better pictures. So far I’ve learned the following:

  1. Lots of pictures. Take lots of different pictures, but also set the camera to burst-mode and take a bunch of each picture. You never know if there will be a small change in expression or if someone blinked, and taking several shots of the same picture can make the difference. Also, holding down the shutter causes less camera-shake than pressing the shutter, so second and third shots are likely to be sharper.
  2. Critical evaluation. Figure out what went right or wrong. My #1 problem is that I don’t notice the background while I take the photo. Too often there is a pole sticking out of someone’s head, or there are distractions like garbage pails or the edges of cars. I could re-position myself to avoid all that.
  3. Make the whole picture interesting. When I look at Vivian Maier’s pictures, the composition is fantastic. Every picture is clearly about its subject, but there is something interesting everywhere you look (texture on building walls, the shape of cars, street crowds, signs on buildings, reflections in puddles or windows).

Being good at #3 is a key difference between an amateur and a pro. Maier was technically an amateur. If you never read about her, look her up. The story is amazing. She would have been one of the most celebrated street photographers in history had she pursued it as a career.

I relate to street photographers because my family has no patience to pose for portraits. I get them to pose for a second when we go someplace special, and the photos capture them and the moment.

I don’t have much interest in photographing anything else. Occasionally I’ll take a shot of the sign over a restaurant we visited or a landscape shot, but just as a rememberance. Otherwise I only want to take pictures of the people I care about.

The photo above was taken on a bridge that separates Kennebunk from Kennebunkport. We walked over it while sightseeing during their Christmas Prelude celebration. My family visits Maine each summer, and this was the first time we were there in cold weather. Maine is photogenic all year round.